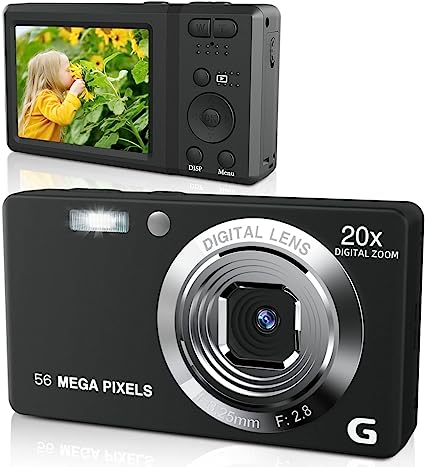
Demystifying Camera Specifications: A Personal Guide
From the perspective of a seasoned photographer, I understand that the jargon of camera specifications can be overwhelming for beginners. The megapixels, ISO, sensor size, and aperture – all these terms might seem like a foreign language to those new to the photography world. In this blog post, I’ll break down some of the crucial camera specifications and explain why they matter, based on my personal experience.
Megapixels
You’ve probably heard that more megapixels mean better images, but that’s not always the case. Megapixels denote the total count of tiny dots (pixels) that make up an image. Yes, more megapixels do provide a higher level of detail, but after a certain point (typically around 12MP, in my experience), the human eye can’t discern the difference unless you’re printing your photos on a large scale.
Sensor Size
When it comes to image quality, the sensor size is far more critical than the megapixel count. A larger sensor can gather more light, resulting in better image quality, especially in low-light situations. I’ve found that full-frame or APS-C sensors typically provide excellent image quality across different lighting conditions.
Aperture
The aperture of a camera lens controls the amount of light that hits the camera sensor. It’s represented as f/number (like f/2.8 or f/1.8). A smaller number means a larger aperture (and more light allowed in), leading to a brighter image and a shallower depth of field. My go-to lens for portrait photography is an 85mm f/1.4, which offers a beautifully blurred background (bokeh).
ISO
ISO represents the camera sensor’s sensitivity to light. A higher ISO number means higher sensitivity, which can brighten up your photos in low light conditions. However, a higher ISO can also introduce more digital noise (grain) into your images. I usually try to keep my ISO as low as possible and increase it only when necessary.
Shutter Speed
The shutter speed determines how long the camera’s shutter remains open when taking a photo. A faster shutter speed (like 1/2000) can freeze action, while a slower shutter speed (like 1/30) can introduce motion blur. When photographing sports, I often use faster shutter speeds to capture the action without blur.
Image Stabilization
Image stabilization can be a real lifesaver when you’re shooting handheld. It helps to minimize the blurring that can occur from small movements. In my experience, this is particularly helpful when shooting in lower light conditions where a slower shutter speed may be necessary.
Spotting Poor Camera Specifications: A Personal Account
As an ardent photography enthusiast, I’ve had my fair share of experiences with various cameras. Some of them had outstanding specifications, while others were, unfortunately, lacking. The difference between an impressive photo and a subpar one often lies in understanding camera specifications and being able to discern the good from the bad. In this blog post, I aim to shed light on some examples of poor camera specifications based on my personal encounters.
Inadequate Megapixels
In today’s digital age, a camera with anything less than 12 megapixels would be considered poor. A lower megapixel count means less detail in your images, which becomes glaringly obvious when you zoom in or print your photos. I remember using an old point-and-shoot camera with just 5 megapixels, and the images looked fine on screen but turned out grainy and pixelated when printed.
Small Sensor Size
A camera’s sensor size is a crucial factor in image quality. In my experience, smaller sensor sizes often fail to deliver high-quality images, especially under less-than-ideal lighting conditions. Cameras with smaller sensors, such as 1/2.3″ typically found in basic point-and-shoot cameras, struggle to capture detail and color accuracy. They also suffer from higher noise levels, especially at higher ISO settings.
Limited ISO Range
An ISO range that does not go beyond 1600 is generally considered poor in today’s standards. A limited ISO range restricts your ability to adjust the camera’s sensitivity to light, especially in challenging lighting conditions. I once had a camera with an ISO cap of 800, and it struggled to capture clear, noise-free images in low light scenarios.
Fixed or Slow Aperture Lens
A camera with a fixed or slow aperture lens can be a significant limitation. For instance, a lens with an aperture of f/5.6 or higher might not let in enough light to get sharp, well-exposed photos in dim conditions. Moreover, lenses with smaller maximum apertures (represented by higher f-numbers) will provide less background blur, which can be disappointing when shooting portraits or similar shots where you want to isolate the subject.
Absence of Image Stabilization
In my journey, I’ve found image stabilization to be incredibly useful in numerous shooting conditions. Cameras lacking this feature can lead to blurry images, especially in low light conditions or when using a slower shutter speed. Trust me, I’ve had my fair share of blurred shots from cameras that lacked this critical feature.
A Personal Analysis of the Worst Camera Models: Learning from Experience
Over the years, I’ve had the opportunity – or should I say misfortune – to encounter a few camera models that didn’t quite hit the mark. While I firmly believe that a great photographer can make the most of any tool, some camera models make this task considerably more challenging due to poor specifications or design flaws. In this blog post, I’ll share my personal experiences with some of the worst camera models I’ve used and provide an analysis of where they went wrong.
Kodak EasyShare C300
The first camera on my list is the Kodak EasyShare C300. With its 3.2 megapixels and tiny 1/2.7″ sensor, this camera was a letdown right from the start. I remember being excited about its easy-to-use interface, but my enthusiasm quickly waned when I saw the grainy, dull photos it produced. For its time, it might have been acceptable, but it just doesn’t stand up to today’s standards.
Yashica Y35 DigiFilm
The Yashica Y35 DigiFilm seemed like an exciting concept, promising to blend the charm of film photography with the convenience of digital. Unfortunately, it failed to deliver. With its fake film rolls and problematic shutter mechanism, the camera was more of a gimmick than a practical tool. The image quality, too, was disappointing, marred by poor color reproduction and high noise levels.
Polaroid iF045
I had high hopes for the Polaroid iF045, with its dual LCD screens and waterproof feature. Unfortunately, the overall performance and image quality were subpar. With a low resolution of 14 megapixels, poor low-light performance, and lack of optical zoom, the camera struggled to produce clear and vibrant images. The user interface was also confusing and not very intuitive.
Sigma SD15
The Sigma SD15 is another camera that I found to be quite disappointing. Despite its promising Foveon X3 sensor, which was supposed to capture more detail and color information, the camera produced images with strange color casts and high levels of noise. The camera’s slow processing speed and poor battery life were also significant drawbacks during my testing.
Vivitar ViviCam X024
The Vivitar ViviCam X024 was another camera that promised a lot but delivered little. It boasted of a 10.1-megapixel sensor, but the images were far from impressive, suffering from soft focus and poor color accuracy. The low-resolution 1.8-inch screen and absence of image stabilization made the user experience all the more challenging.
The Implications of Using a Bad Camera: Lessons from Experience
In my years as a photography enthusiast, I’ve had my fair share of experiences with a wide range of cameras, from top-of-the-line DSLRs to modest point-and-shoots. Not all cameras are created equal, and using a bad camera can have far-reaching implications for your photography journey. In this post, I’ll delve into the lessons I’ve learned from my experiences with less-than-stellar camera models and the implications they can have on your work.
Poor Image Quality
Perhaps the most apparent implication of using a bad camera is poor image quality. Cameras with low megapixel counts, small sensors, and limited ISO ranges often produce images that are grainy, dull, or lacking in detail. When I used the Kodak EasyShare C300, for example, the resulting images often appeared pixelated and lacked the fine detail that would have made them truly stand out.
Limited Creative Control
Many poorly designed cameras offer limited creative control, making it difficult to capture your vision accurately. Cameras with fixed or slow aperture lenses, for instance, can limit your ability to control depth of field and capture images in low light conditions. I remember the frustration of trying to shoot a portrait with a camera that had a maximum aperture of f/5.6 — the inability to blur the background made it impossible to achieve the look I wanted.
Difficulty in Challenging Conditions
Bad cameras often struggle in challenging shooting conditions. With the Polaroid iF045, I found it almost impossible to capture usable images in low light conditions due to the camera’s poor ISO range and lack of image stabilization. This limitation can restrict your ability to shoot in a variety of conditions and scenarios, hampering your growth as a photographer.
Slower Workflow
Poorly designed cameras can also lead to a slower workflow. The Sigma SD15, for example, had a slow processing speed that made it a challenge to shoot in rapid succession. This can be a significant drawback when shooting action or any scene that requires a quick response.
Potential for Frustration and Disappointment
Above all, using a bad camera can lead to frustration and disappointment, especially if you’re passionate about photography. There’s nothing quite as disheartening as capturing what you think is a great shot, only to find that the camera’s limitations have prevented it from realizing its full potential.
How to Avoid Buying a Bad Camera: Insights from Personal Experience
As a self-confessed photography enthusiast who has dabbled in different types of cameras over the years, I’ve learned a thing or two about what to look for and, more importantly, what to avoid when investing in a camera. It’s an art and science to pick a camera that truly suits your needs without falling for the all too common pitfalls that lead to purchasing a bad camera. Here are some of my top tips, garnered from personal experience, on how to avoid buying a bad camera.
Do Your Homework
First and foremost, always do your research before buying a camera. Investigate the camera’s specifications, read reviews, and understand what each feature offers. It’s crucial not to get swayed by fancy marketing terms or aesthetically pleasing designs without understanding what lies beneath the surface.
Understand Camera Specifications
Understanding the meaning behind camera specifications can save you from a lot of disappointments. Megapixels, sensor size, ISO range, lens quality, and autofocus capabilities are just a few aspects that need consideration. Don’t get drawn in by high megapixel numbers alone. Remember, the sensor size and lens quality are just as important, if not more so, for image quality.
Try Before You Buy
Whenever possible, try before you buy. Whether it’s in a store or borrowing from a friend, getting your hands on a camera to experience its feel, weight, and operation can provide valuable insights. When I was considering buying the Nikon Coolpix L840, testing it beforehand made me realize that its ergonomics were not ideal for my style of shooting, which was a deal-breaker for me.
Don’t Ignore the Lens
The lens is a critical component of a camera, and a poor-quality lens can greatly diminish image quality, even with a good camera body. Pay attention to the lens’ maximum aperture, build quality, and if it offers image stabilization.
Beware of Too Good to Be True Deals
Camera deals that seem too good to be true often are. Many times, these deals involve older or lower-end models that may not provide the image quality or features you need. When I first started photography, I fell for a “great deal” on a Fujifilm FinePix A400, only to quickly realize that its poor performance and limited features were far from a bargain.
Consider Your Specific Needs
Every photographer’s needs are different, so consider what you’ll be using the camera for before making a purchase. If you’re into sports photography, you’ll need a camera with fast autofocus and continuous shooting capabilities. For portraiture, a camera that works well with prime lenses and has good skin tone rendition would be preferable.
Read User Reviews
User reviews can be a goldmine of information. They offer real-life experiences and insights about the camera’s performance, build quality, and any potential issues. I’ve found user reviews to be a valuable resource for identifying recurring problems in certain models.
Your Frequently Asked Questions (FAQ) Answered: Insights from Personal Experience
As a photography enthusiast who has navigated the exciting world of cameras, lenses, and photography techniques, I’ve encountered numerous questions from fellow enthusiasts seeking answers to common queries. In this blog post, I aim to address some of the most frequently asked questions (FAQ) based on my personal experience and knowledge. So, let’s dive in and unravel the mysteries behind these common questions!
1. What Camera Should I Buy as a Beginner?
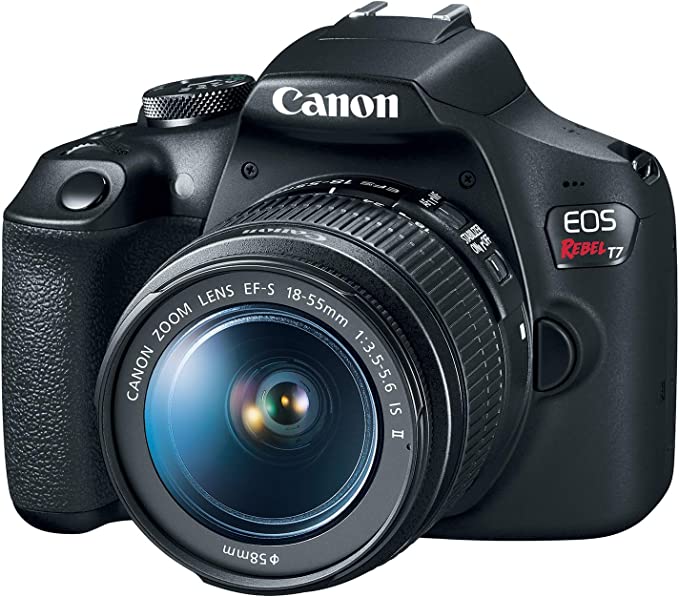
Choosing the right camera as a beginner can be overwhelming, but fear not! I highly recommend starting with a DSLR or mirrorless camera. These camera types offer versatility, manual control, and room for growth as you develop your skills. Entry-level models such as the Canon EOS Rebel series or the Sony Alpha a6000 are excellent options to consider.
2. What Lens Should I Invest in First?
When it comes to lenses, the nifty fifty (a 50mm prime lens) is a fantastic starting point for any photographer. It offers a wide aperture (typically around f/1.8) that allows for beautiful background blur and low-light capabilities. Its versatility makes it suitable for various genres, including portraits, street photography, and even product photography.
3. How Do I Improve my Composition Skills?
Composition is a key element in creating visually compelling photographs. To enhance your composition skills, practice the rule of thirds, leading lines, and experimenting with different perspectives. Study the works of renowned photographers, attend workshops, and challenge yourself to see the world from unique angles. Most importantly, keep practicing and refining your eye for composition.
4. How Can I Capture Sharp Photos?
Achieving sharpness in your photos requires attention to detail. Start by using a sturdy tripod and utilizing the camera’s self-timer or a remote shutter release to minimize camera shake. Selecting an appropriate aperture, ensuring proper focus, and using fast enough shutter speeds can also contribute to sharp images. Don’t forget to clean your lens regularly and be mindful of any lens filters that may impact image quality.
5. How Can I Make the Best Use of Natural Light?
Natural light can create stunning images when used effectively. Avoid shooting during the harsh midday sun and instead opt for the “golden hours” — the hour after sunrise and the hour before sunset. Embrace soft and diffused light, such as that provided by cloudy days or shooting in shaded areas. Experiment with backlighting, sidelighting, and observing how light interacts with your subject to create depth and mood.
6. How Do I Deal with Low-Light Photography?
Low-light photography can be challenging but also rewarding. Start by using a wide aperture lens and increasing your camera’s ISO settings to capture more light. Embrace slower shutter speeds, but be cautious of camera shake and consider using a tripod or image stabilization. Experiment with long exposures, and don’t be afraid to explore noise reduction techniques in post-processing software.
